前言
有的时候指向外链的超链接的显示文字可能根本不能让你了解到这是来源于哪个站点的,鼠标移上去看左下角又不太优雅,于是写了个这样的预览框。
效果
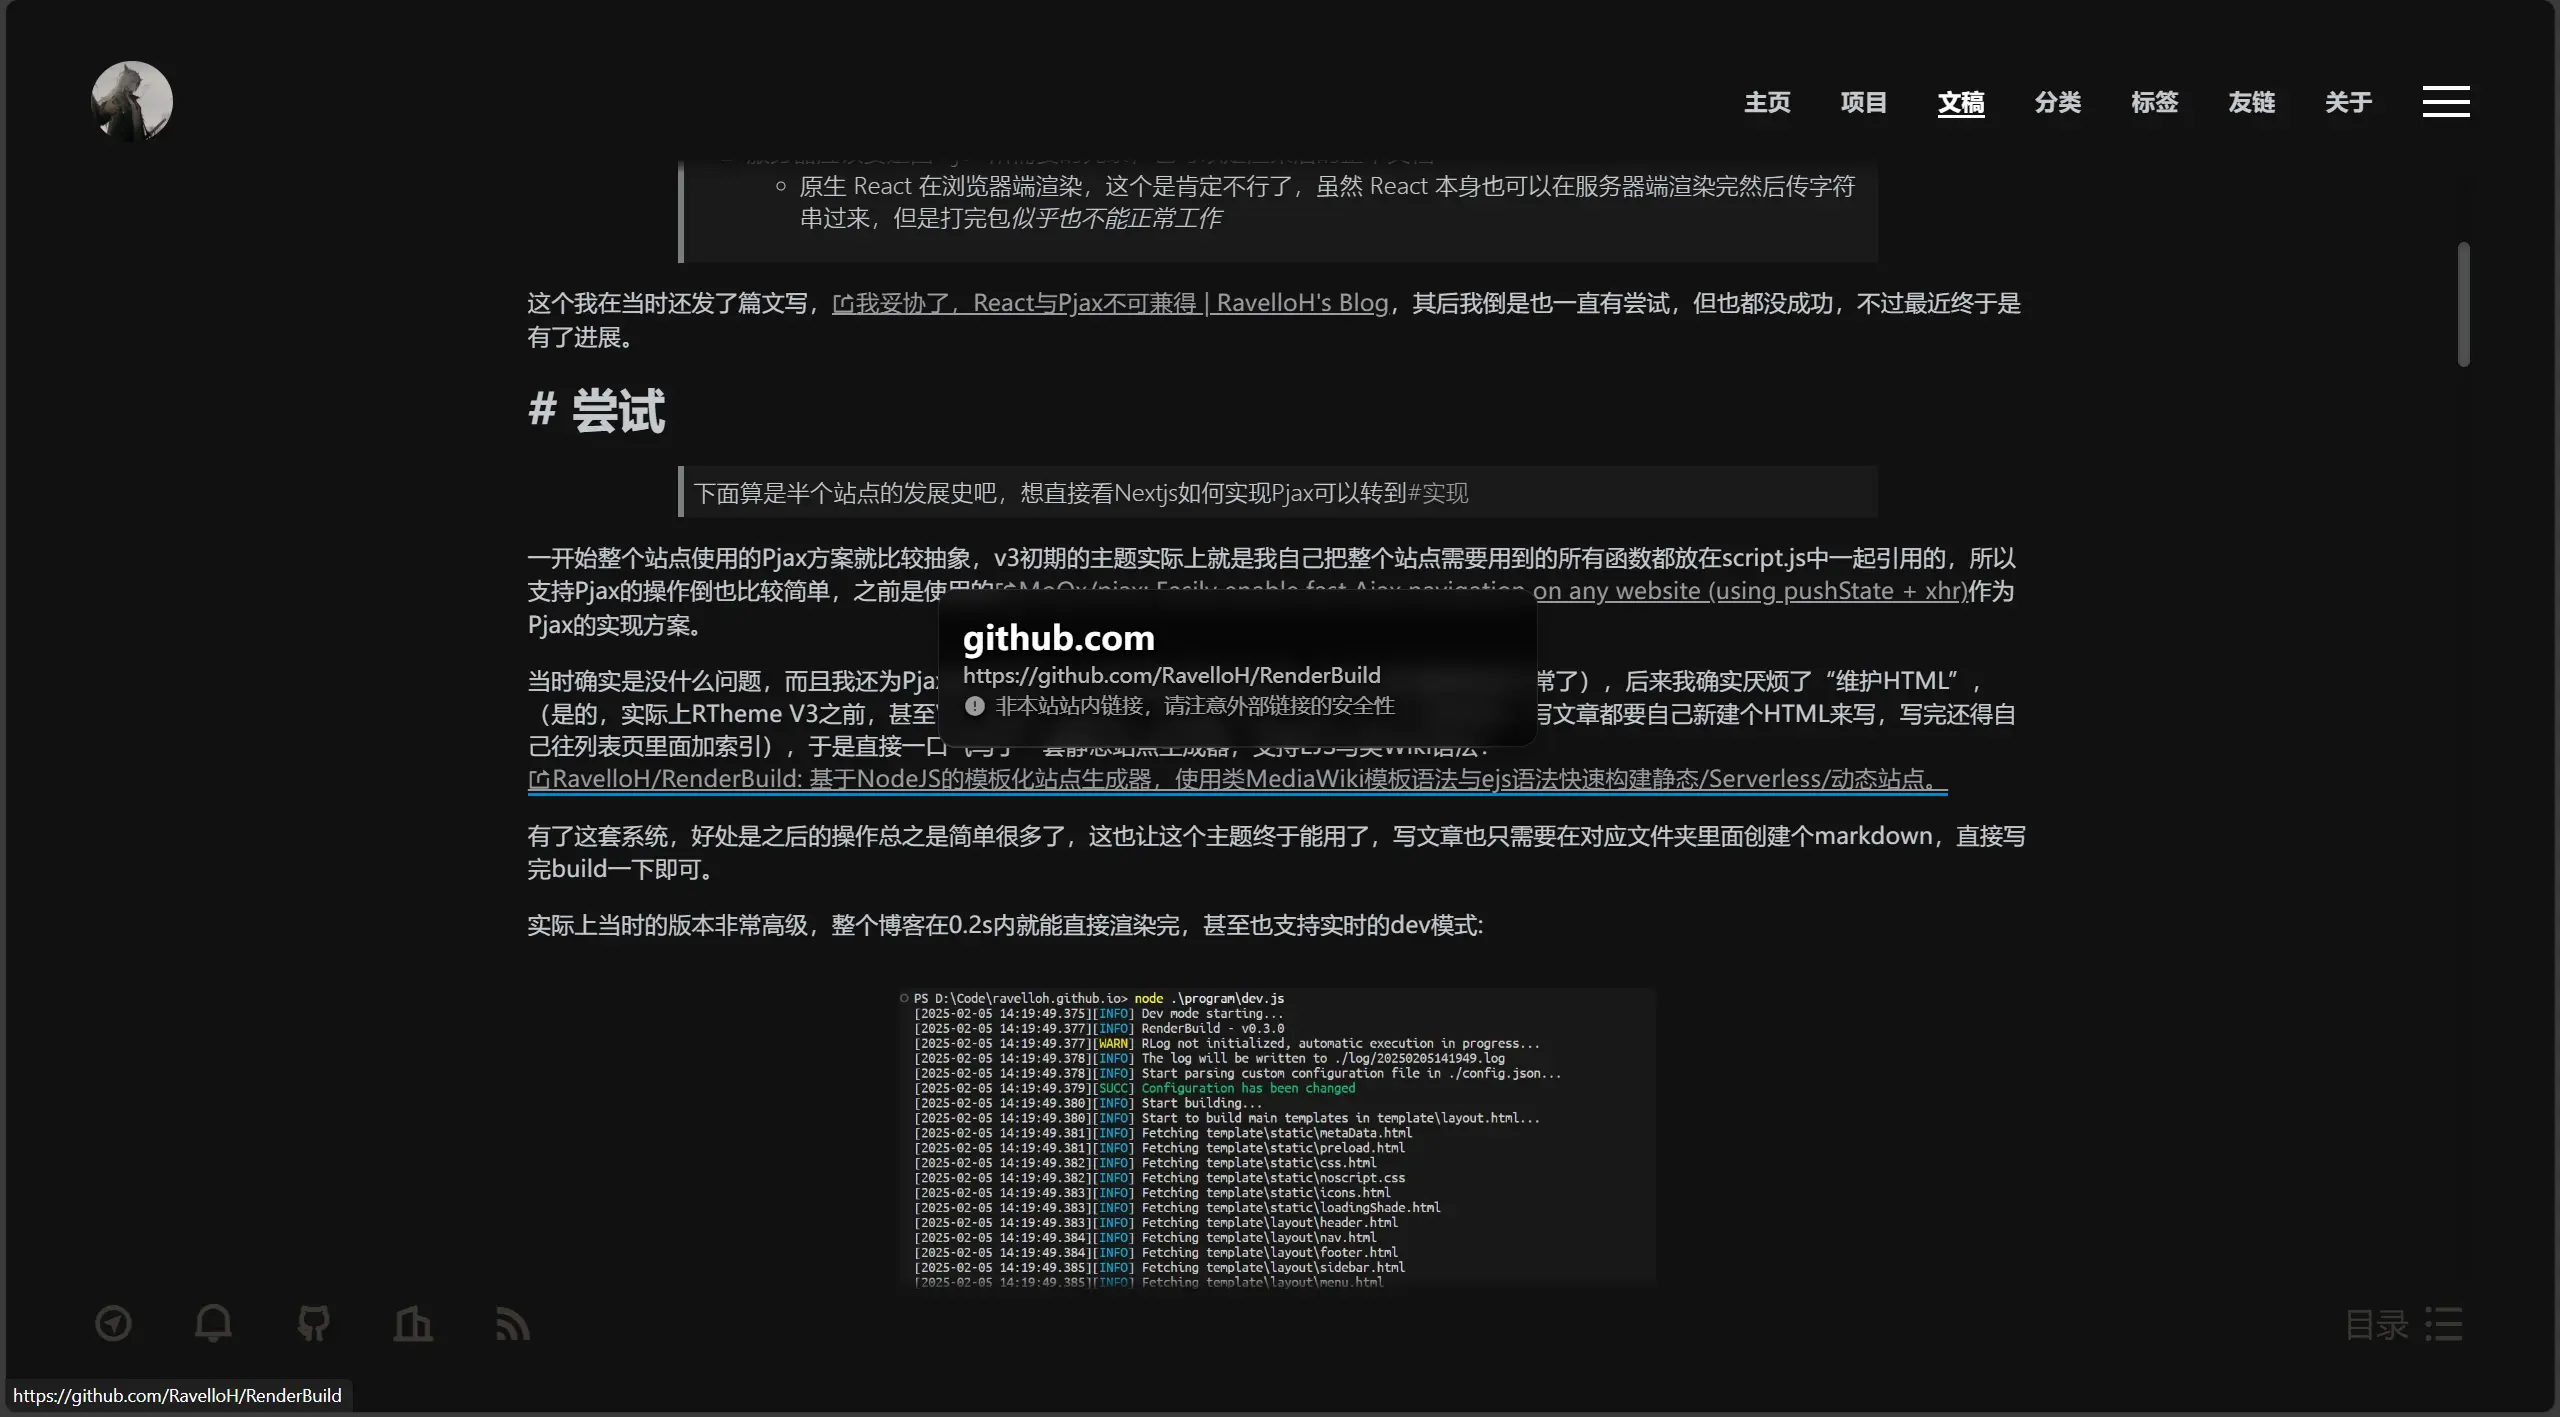 screenshot-loading
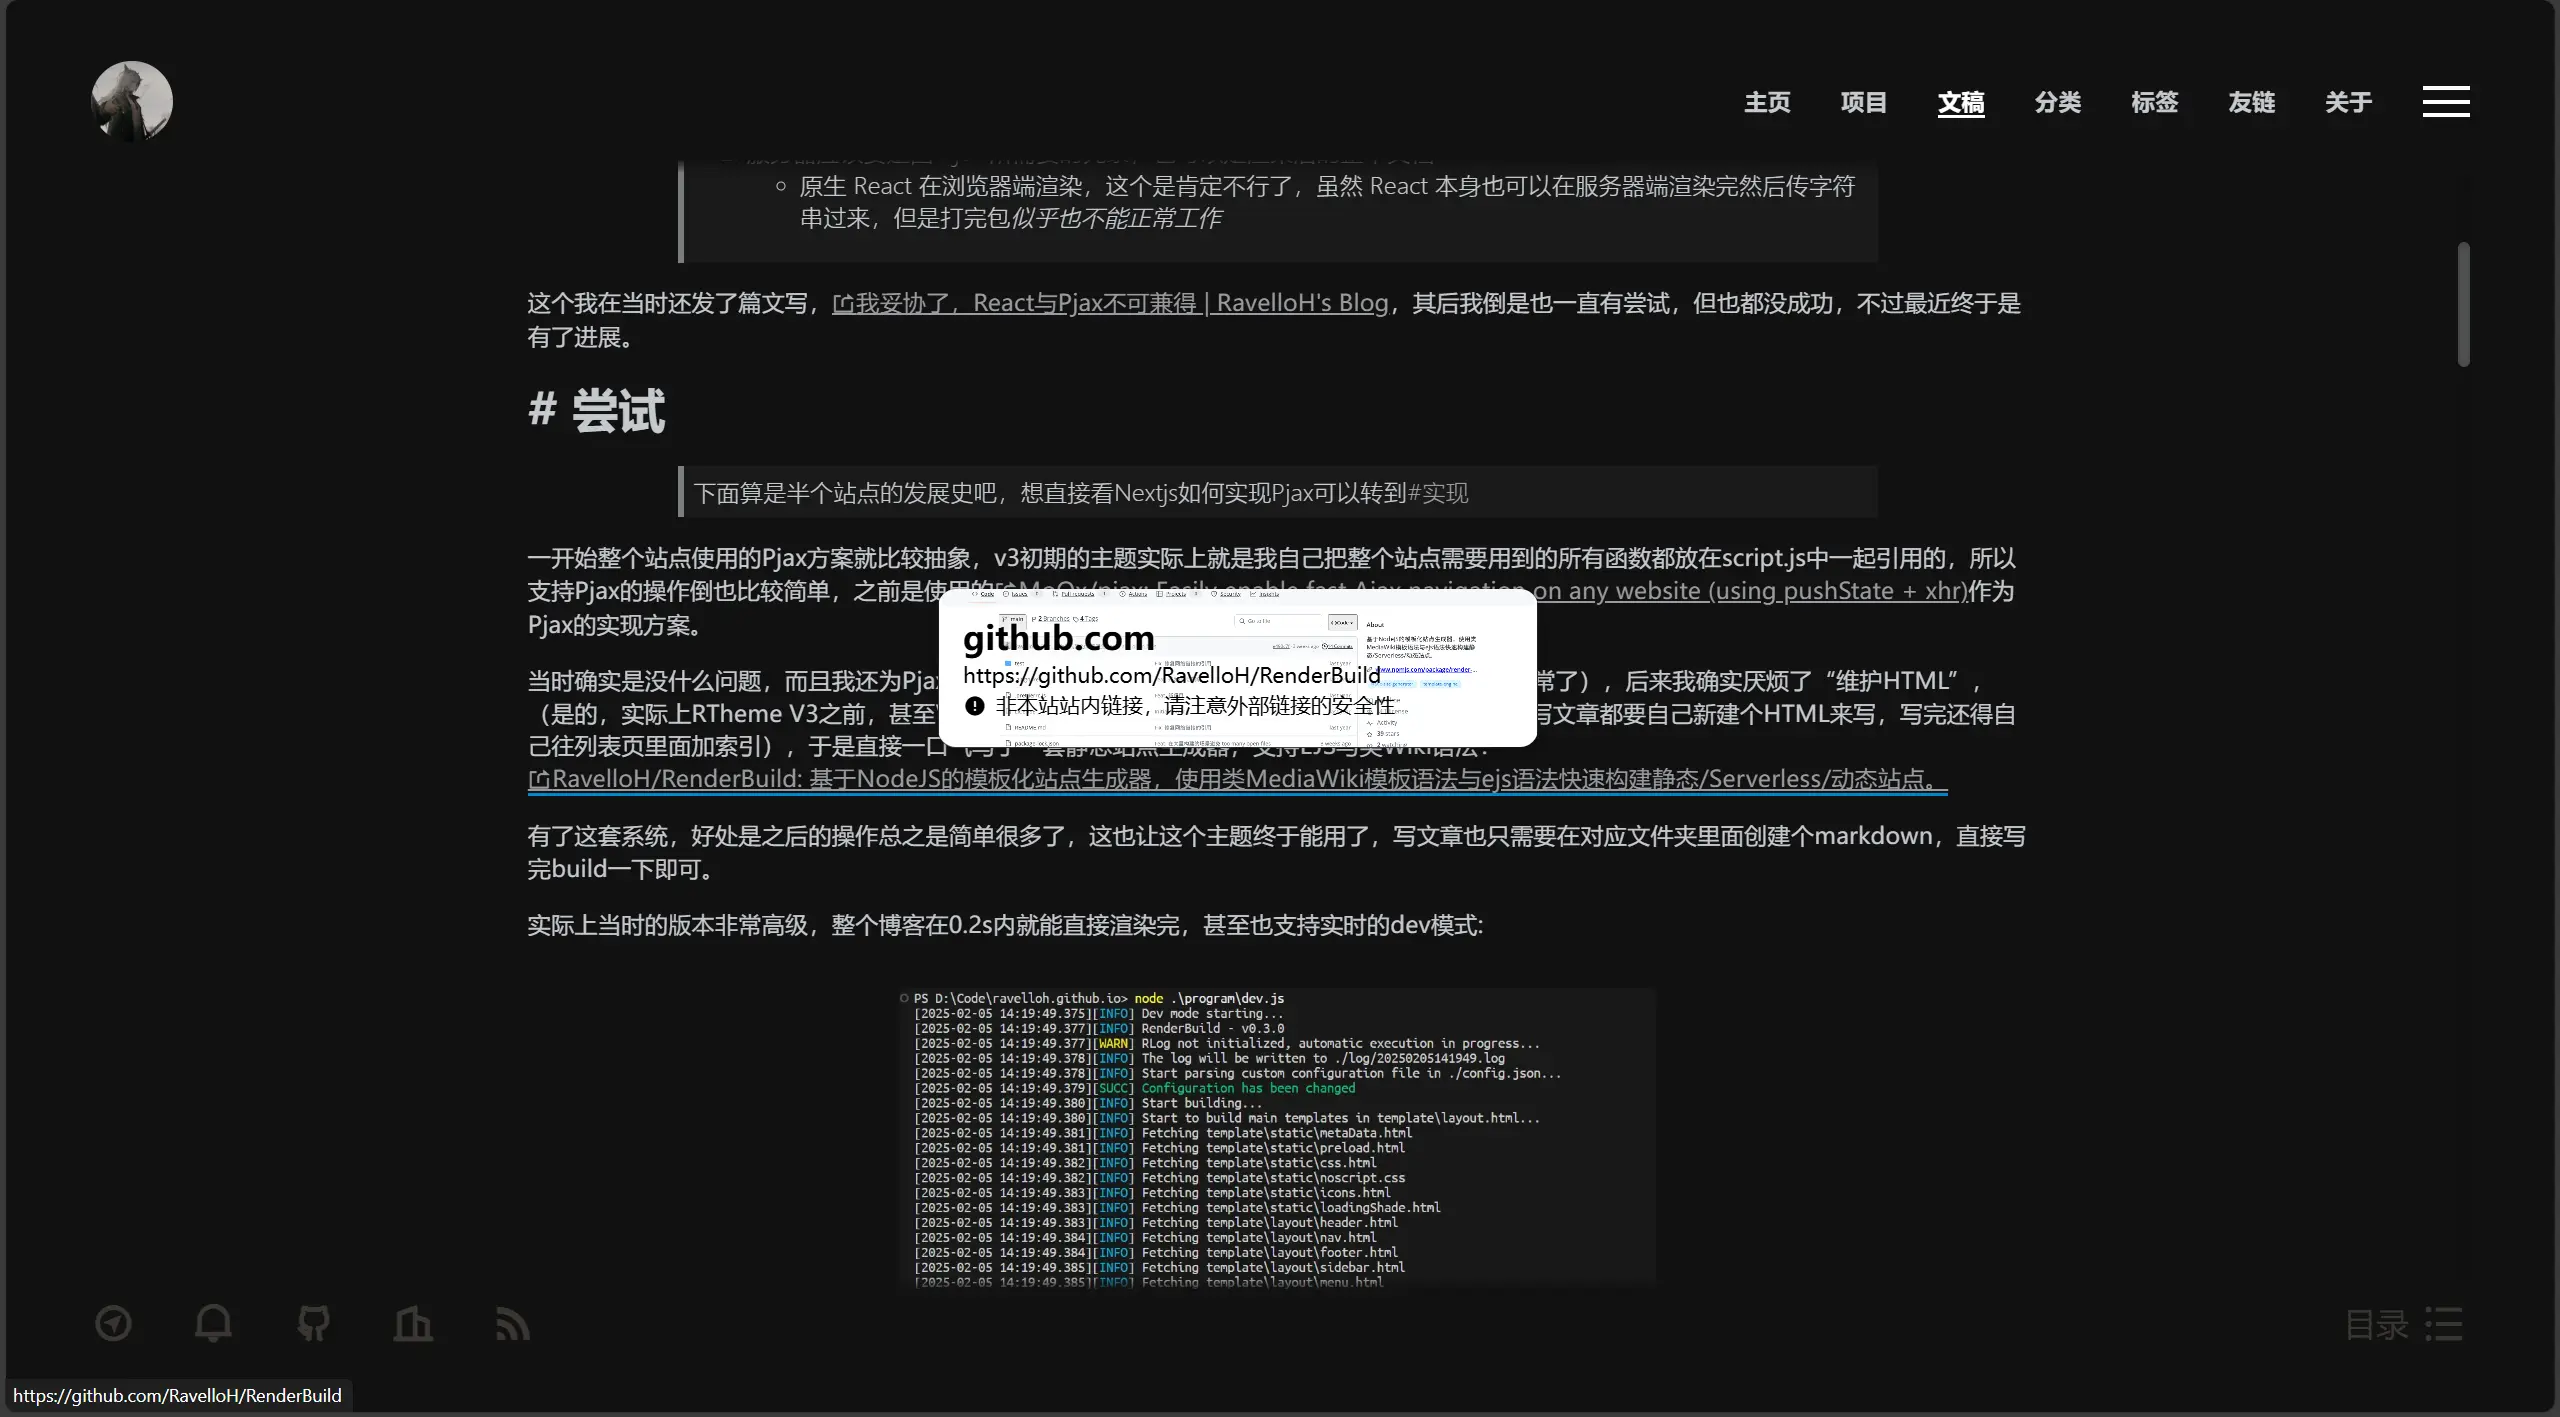 screenshot-loaded
当鼠标悬停在 target="_blank" 的超链接上时,会出现一个带模糊背景的弹出窗口,显示网站的主域名和完整 URL,同时附带一个提醒,告知该链接为外部链接。同时会加载目标页面的截图,获取到截图后根据图片的中心色,自动选择字体颜色(黑/白)。
你也可以在下方这个外链上自己试试:
RTheme/src/components/LinkPreview.jsx at main · RavelloH/RTheme
使用
在所需的页面引入下方的jsx即可,你可以修改下方const link = e.target.closest('article a[target="_blank"]');的定义来自定义哪些元素要有此效果。默认是article元素下的具有target="_blank"的标签。
另,截图功能依靠Lete114/WebStack-Screenshot: 📸 Website Screenshot API,这里是用到我部署在Vercel上的APIhttps://screenshot.ravelloh.top,你也可以自己部署一个把下面的api链接换了。
截图为了加快加载,默认缓存2592000秒(30天)。
'use client';

import { useEffect } from 'react';

const styles = {
    preview: {
        position: 'absolute',
        background: 'rgba(0, 0, 0, 0.65)',
        backdropFilter: 'blur(8px)',
        WebkitBackdropFilter: 'blur(8px)',
        backgroundSize: 'cover',
        backgroundPosition: 'center',
        backgroundRepeat: 'no-repeat',
        border: '1px solid rgba(255, 255, 255, 0.1)',
        borderRadius: '12px',
        padding: '16px',
        maxWidth: '400px',
        width: 'calc(100vw - 32px)',
        boxShadow: '0 4px 12px rgba(0, 0, 0, 0.2)',
        zIndex: 1000,
        fontSize: '14px',
        transition: 'opacity 0.3s ease',
        opacity: 0,
        pointerEvents: 'none',
        color: '#fff',
        textShadow: '0 1px 3px rgba(0, 0, 0, 0.9), 0 2px 6px rgba(0, 0, 0, 0.9)',
        overflow: 'hidden',
        '&.loading': {
            backgroundImage: 'none !important',
            animation: 'shimmer 2.5s infinite linear',
            backgroundSize: '400% 100%',
            background:
                'linear-gradient(90deg, rgba(255,255,255,0.06) 0%, rgba(255,255,255,0.12) 50%, rgba(255,255,255,0.06) 100%)',
        },
    },
    header: {
        display: 'flex',
        alignItems: 'center',
        gap: '8px',
        marginBottom: '12px',
        lineHeight: '20px',
        textShadow: '0 1px 3px rgba(0, 0, 0, 0.9), 0 2px 6px rgba(0, 0, 0, 0.9)',
    },
    title: {
        margin: '0',
        fontSize: '16px',
        fontWeight: 'bold',
        color: '#fff',
        lineHeight: '20px',
        display: 'flex',
        alignItems: 'center',
        textShadow: '0 1px 3px rgba(0, 0, 0, 0.9), 0 2px 6px rgba(0, 0, 0, 0.9)',
        overflow: 'hidden',
        textOverflow: 'ellipsis',
        whiteSpace: 'nowrap',
        maxWidth: '100%',
    },
    url: {
        color: 'rgba(255, 255, 255, 0.7)',
        fontSize: '13px',
        marginBottom: '12px',
        wordBreak: 'break-all',
        textShadow: '0 1px 3px rgba(0, 0, 0, 0.9), 0 2px 6px rgba(0, 0, 0, 0.9)',
        overflow: 'hidden',
        textOverflow: 'ellipsis',
        display: '-webkit-box',
        '-webkit-line-clamp': '2',
        '-webkit-box-orient': 'vertical',
        whiteSpace: 'normal',
        maxHeight: '2.6em',
    },
    warning: {
        display: 'flex',
        alignItems: 'center',
        gap: '6px',
        color: 'rgba(255, 255, 255, 0.6)',
        fontSize: '12px',
        paddingTop: '12px',
        borderTop: '1px solid rgba(255, 255, 255, 0.1)',
        textShadow: '0 1px 3px rgba(0, 0, 0, 0.9), 0 2px 6px rgba(0, 0, 0, 0.9)',
    },
};

export default function LinkPreview() {
    useEffect(() => {
        let currentPreview = null;
        let timeout = null;

        const createPreview = (link) => {
            const preview = document.createElement('div');
            preview.className = 'link-preview loading';
            const bgImageUrl = `https://screenshot.ravelloh.top/?url=${encodeURIComponent(
                link.href,
            )}&viewport=1600x800&cache=2592000`;

            Object.assign(preview.style, styles.preview);

            const url = link.href;
            const hostname = new URL(url).hostname;

            preview.innerHTML = `
                <div style="${Object.entries(styles.header)
                    .map(([k, v]) => `${k}:${v}`)
                    .join(';')}">
                    <h4 style="${Object.entries(styles.title)
                        .map(([k, v]) => `${k}:${v}`)
                        .join(';')}">
                        ${hostname}
                    </h4>
                </div>
                <div style="${Object.entries(styles.url)
                    .map(([k, v]) => `${k}:${v}`)
                    .join(';')}">
                    ${url}
                </div>
                <div style="${Object.entries(styles.warning)
                    .map(([k, v]) => `${k}:${v}`)
                    .join(';')}">
                    <span class="i_mini ri-error-warning-fill"></span>
                    非本站站内链接,请注意外部链接的安全性
                </div>
            `;

            const img = new Image();
            img.crossOrigin = 'Anonymous';
            img.onload = () => {
                const canvas = document.createElement('canvas');
                const ctx = canvas.getContext('2d');
                canvas.width = img.width;
                canvas.height = img.height;
                ctx.drawImage(img, 0, 0);

                // 获取图片中心区域的亮度
                const imageData = ctx.getImageData(
                    img.width * 0.25,
                    img.height * 0.25,
                    img.width * 0.5,
                    img.height * 0.5,
                );
                const data = imageData.data;
                let brightness = 0;

                for (let i = 0; i < data.length; i += 4) {
                    brightness += data[i] * 0.299 + data[i + 1] * 0.587 + data[i + 2] * 0.114;
                }
                brightness = brightness / (data.length / 4) / 255;

                const textColor = brightness > 0.6 ? '#000' : '#fff';
                const textShadow =
                    brightness > 0.6
                        ? '0 1px 3px rgba(255, 255, 255, 0.9), 0 2px 6px rgba(255, 255, 255, 0.9)'
                        : '0 1px 3px rgba(0, 0, 0, 0.9), 0 2px 6px rgba(0, 0, 0, 0.9)';

                preview.querySelectorAll('div, h4').forEach((el) => {
                    el.style.color = textColor;
                    el.style.textShadow = textShadow;
                });

                preview.classList.remove('loading');
                preview.style.backgroundImage = `url("${bgImageUrl}")`;
            };
            img.src = bgImageUrl;

            return preview;
        };

        const showPreview = (link) => {
            const rect = link.getBoundingClientRect();
            const preview = createPreview(link);
            document.body.appendChild(preview);

            const previewRect = preview.getBoundingClientRect();
            const top = rect.top - previewRect.height - 10;

            let left = rect.left + (rect.width - previewRect.width) / 2;
            const minLeft = 16;
            const maxLeft = window.innerWidth - previewRect.width - 16;
            left = Math.max(minLeft, Math.min(left, maxLeft));

            Object.assign(preview.style, {
                top: `${top}px`,
                left: `${left}px`,
            });

            requestAnimationFrame(() => {
                preview.style.opacity = '1';
            });

            currentPreview = preview;
        };

        const hidePreview = () => {
            if (currentPreview) {
                currentPreview.style.opacity = '0';
                setTimeout(() => {
                    currentPreview?.remove();
                    currentPreview = null;
                }, 300);
            }
        };

        const handleMouseEnter = (e) => {
            const link = e.target.closest('article a[target="_blank"]');
            if (link) {
                timeout = setTimeout(() => {
                    showPreview(link);
                }, 300);
            }
        };

        const handleMouseLeave = () => {
            if (timeout) {
                clearTimeout(timeout);
                timeout = null;
            }
            hidePreview();
        };

        document.addEventListener('mouseover', handleMouseEnter);
        document.addEventListener('mouseout', handleMouseLeave);

        return () => {
            document.removeEventListener('mouseover', handleMouseEnter);
            document.removeEventListener('mouseout', handleMouseLeave);
            if (currentPreview) {
                currentPreview.remove();
            }
        };
    }, []);

    return null;
}
mini版
如果你只需要显示个背景模糊框而不需要截图,那么用下面这个就行。
'use client';

import { useEffect } from 'react';

const styles = {
    preview: {
        position: 'absolute',
        background: 'rgba(0, 0, 0, 0.65)',
        backdropFilter: 'blur(8px)',
        WebkitBackdropFilter: 'blur(8px)',
        border: '1px solid rgba(255, 255, 255, 0.1)',
        borderRadius: '12px',
        padding: '16px',
        maxWidth: '400px',
        width: 'calc(100vw - 32px)',
        boxShadow: '0 4px 12px rgba(0, 0, 0, 0.2)',
        zIndex: 1000,
        fontSize: '14px',
        transition: 'opacity 0.3s ease',
        opacity: 0,
        pointerEvents: 'none',
        color: '#fff',
    },
    header: {
        display: 'flex',
        alignItems: 'center',
        gap: '8px',
        marginBottom: '12px',
        lineHeight: '20px',
    },
    title: {
        margin: '0',
        fontSize: '16px',
        fontWeight: 'bold',
        color: '#fff',
        lineHeight: '20px',
        display: 'flex',
        alignItems: 'center',
    },
    url: {
        color: 'rgba(255, 255, 255, 0.7)',
        fontSize: '13px',
        marginBottom: '12px',
        wordBreak: 'break-all',
    },
    warning: {
        display: 'flex',
        alignItems: 'center',
        gap: '6px',
        color: 'rgba(255, 255, 255, 0.6)',
        fontSize: '12px',
        paddingTop: '12px',
        borderTop: '1px solid rgba(255, 255, 255, 0.1)',
    },
};

export default function LinkPreview() {
    useEffect(() => {
        let currentPreview = null;
        let timeout = null;

        const createPreview = (link) => {
            const preview = document.createElement('div');
            preview.className = 'link-preview';
            Object.assign(preview.style, styles.preview);

            const url = link.href;
            const hostname = new URL(url).hostname;

            preview.innerHTML = `
                <div style="${Object.entries(styles.header)
                    .map(([k, v]) => `${k}:${v}`)
                    .join(';')}">
                    <h4 style="${Object.entries(styles.title)
                        .map(([k, v]) => `${k}:${v}`)
                        .join(';')}">
                        ${hostname}
                    </h4>
                </div>
                <div style="${Object.entries(styles.url)
                    .map(([k, v]) => `${k}:${v}`)
                    .join(';')}">
                    ${url}
                </div>
                <div style="${Object.entries(styles.warning)
                    .map(([k, v]) => `${k}:${v}`)
                    .join(';')}">
                    <span class="i_mini ri-error-warning-fill"></span>
                    非本站站内链接,请注意外部链接的安全性
                </div>
            `;

            return preview;
        };

        const showPreview = (link) => {
            const rect = link.getBoundingClientRect();
            const preview = createPreview(link);
            document.body.appendChild(preview);

            const previewRect = preview.getBoundingClientRect();
            const top = rect.top - previewRect.height - 10;

            // 修改left计算逻辑,确保不会超出屏幕
            let left = rect.left + (rect.width - previewRect.width) / 2;
            const minLeft = 16; // 左边距
            const maxLeft = window.innerWidth - previewRect.width - 16; // 右边距
            left = Math.max(minLeft, Math.min(left, maxLeft)); // 限制在可视区域内

            Object.assign(preview.style, {
                top: `${top}px`,
                left: `${left}px`,
            });

            requestAnimationFrame(() => {
                preview.style.opacity = '1';
            });

            currentPreview = preview;
        };

        const hidePreview = () => {
            if (currentPreview) {
                currentPreview.style.opacity = '0';
                setTimeout(() => {
                    currentPreview?.remove();
                    currentPreview = null;
                }, 300);
            }
        };

        const handleMouseEnter = (e) => {
            const link = e.target.closest('article a[target="_blank"]');
            if (link) {
                timeout = setTimeout(() => {
                    showPreview(link);
                }, 300);
            }
        };

        const handleMouseLeave = () => {
            if (timeout) {
                clearTimeout(timeout);
                timeout = null;
            }
            hidePreview();
        };

        document.addEventListener('mouseover', handleMouseEnter);
        document.addEventListener('mouseout', handleMouseLeave);

        return () => {
            document.removeEventListener('mouseover', handleMouseEnter);
            document.removeEventListener('mouseout', handleMouseLeave);
            if (currentPreview) {
                currentPreview.remove();
            }
        };
    }, []);

    return null;
}注意,我这里的图标是用的<span class="i_mini ri-error-warning-fill"></span>来直接显示的,上面每图标库的话不会有图标,你可以换成相应的svg:
<svg xmlns="http://www.w3.org/2000/svg" width="1em" height="1em" viewBox="0 0 24 24"><path fill="currentColor" d="M12 22C6.477 22 2 17.523 2 12S6.477 2 12 2s10 4.477 10 10s-4.477 10-10 10m-1-7v2h2v-2zm0-8v6h2V7z"></path></svg>或者在Icônes找更多格式。
原理
功能上没什么可说的,只是创建个临时元素而已,下面用AI生成一份说明。
该组件在 useEffect 中为 article 内的 target="_blank" 链接添加鼠标悬停事件。
- 组件在挂载时使用 useEffect 设置了全局的 mouseover 和 mouseout 事件监听器。
- 当鼠标移到页面中的 article 内部的、target 为 "_blank" 的链接上时,会延时 300 毫秒后调用 showPreview 函数显示预览。
- 当鼠标移出时,清除定时器,并通过 hidePreview 函数隐藏预览。
- showPreview 函数:
- 通过 createPreview 创建一个预览元素,该元素是一个 div,并应用了一系列内联样式(从 styles 对象中转换而来)。
- 预览内容包括:显示链接的 hostname、完整 url 以及一个警告信息,提示用户这是外部链接。
- createPreview 函数:
- 创建预览元素,并设置 loading 状态,同时根据链接构造一个远程截图 API 的 URL 作为背景图片地址。
- 创建一个 Image 对象来加载背景图片,加载完成后在 canvas 上绘制图片,并采集中间区域的亮度信息。
- 根据图片亮度调整预览中各个部分的文字颜色和文字阴影,确保无论背景明暗都能清晰显示信息。
- 最后移除 loading 状态,并把背景图片赋值给预览元素。
- 预览元素的位置计算:
- 根据触发预览的链接元素的边界信息,动态计算预览框的位置,保证不会超出屏幕左右边界。
- 预览的显示和隐藏:
- 显示时通过 requestAnimationFrame 让预览元素渐显(opacity 从 0 变成 1)。
- 隐藏时先设置 opacity 为 0,然后在 300 毫秒后将预览元素从 DOM 中移除。
- 清理工作:
- 在组件卸载时,移除所有事件监听器,并清理残留的预览元素,避免内存泄漏。